In today’s fast-paced digital age, laptops have become indispensable tools in our daily lives. They serve as our portal to the world, enabling us to work, study, connect with loved ones, and even unwind. However, like all mechanical devices, laptops are susceptible to wear and tear over time. One of the most common issues that laptop users face is hinge problems. In this comprehensive guide, we, as seasoned SEO and copywriting experts, will delve deep into the world of laptop hinge repairs, ensuring your device’s longevity.
Understanding Laptop Hinges
Laptop hinges are small but crucial components that allow the opening and closing of the laptop screen. They are designed to be robust, but constant use, mishandling, or accidents can lead to hinge-related issues. The most common signs of hinge problems include:
1. Squeaky Hinges
If your laptop emits an annoying squeaking sound when you open or close it, it’s a clear indication of hinge issues. Ignoring this sound can lead to further damage.
2. Stiff or Loose Hinges
Hinges that feel stiff or overly loose can disrupt the smooth operation of your laptop. A well-functioning hinge should allow your screen to stay in place at any angle without resistance.
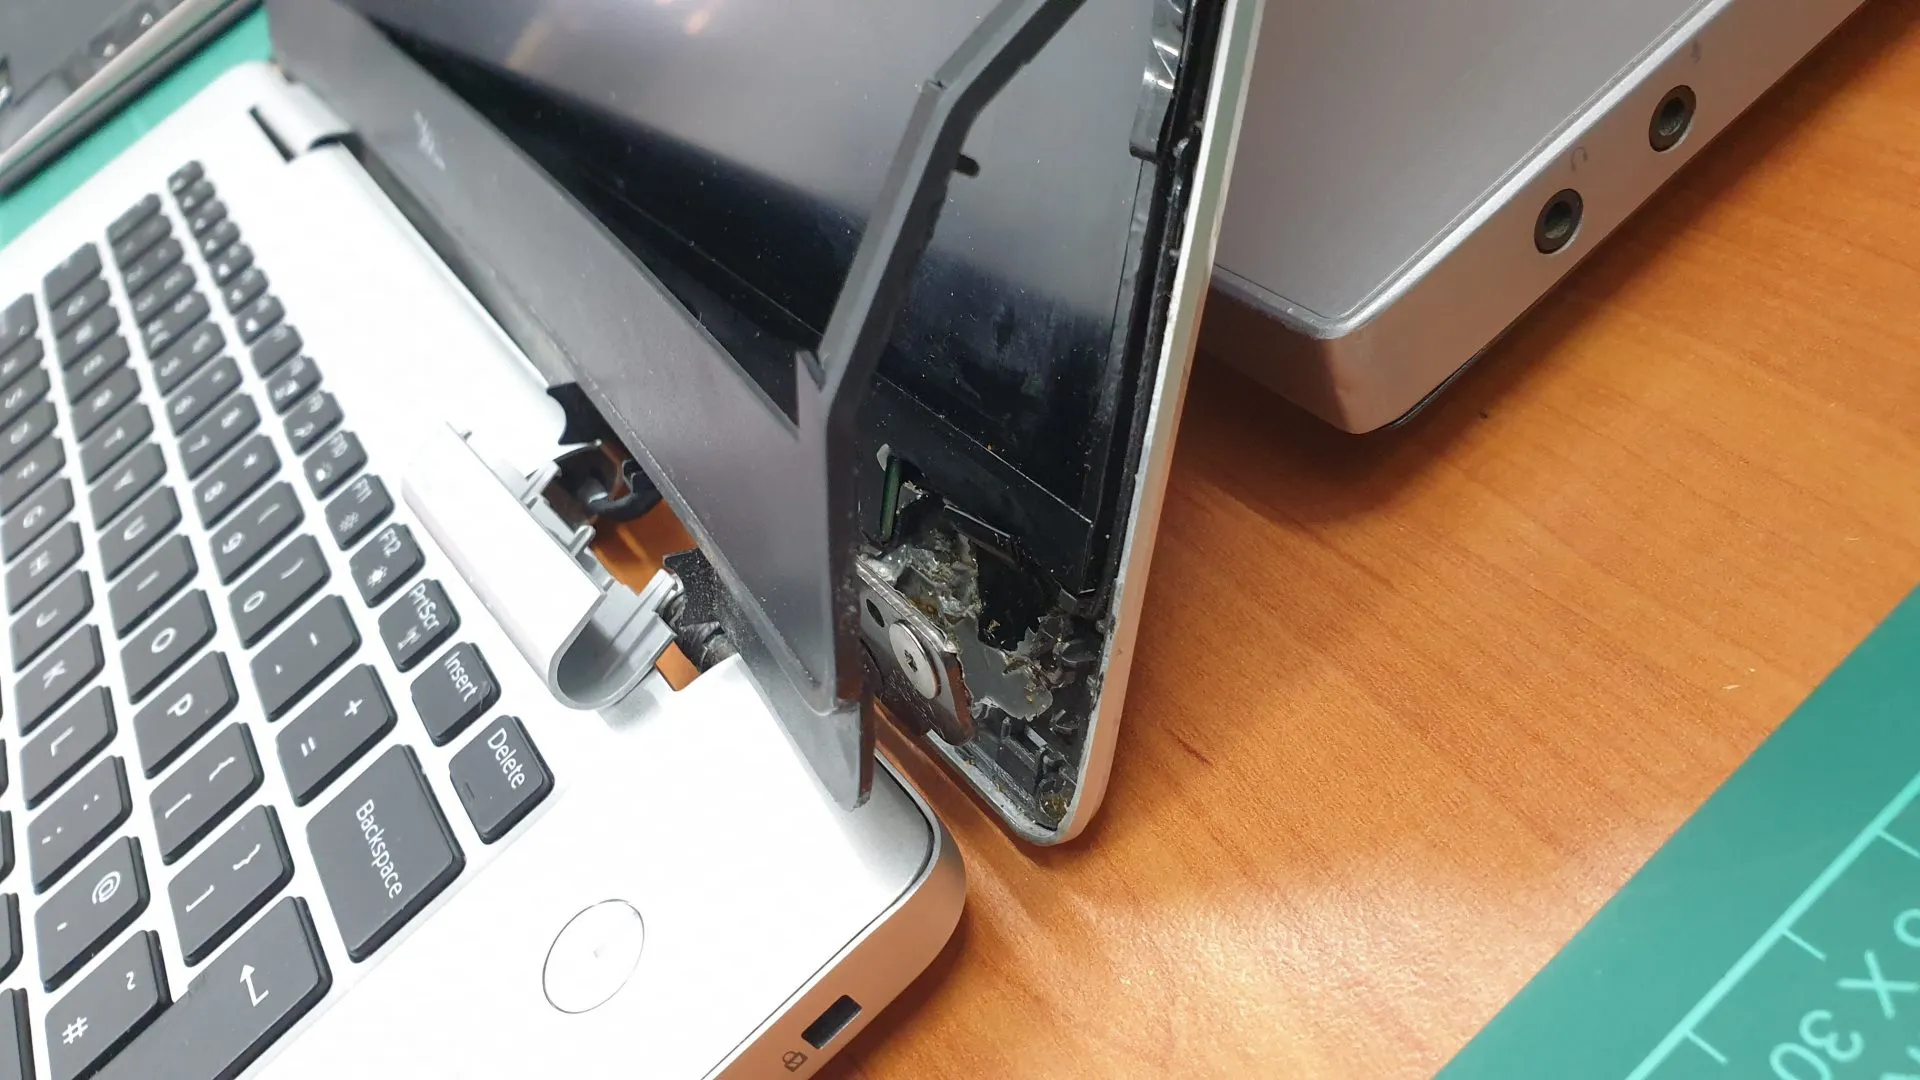
3. Cracked or Broken Hinges
Visible damage to the hinges, such as cracks or fractures, is a serious problem. These issues can cause the screen to detach from the laptop body.
DIY Laptop Hinge Repairs
While it’s always recommended to seek professional assistance for complex laptop repairs, some minor hinge issues can be tackled at home. Here’s a step-by-step guide for DIY laptop hinge repairs:
1. Gather the Necessary Tools
Before you begin, gather the essential tools, including screwdrivers, pliers, and replacement hinges (if needed). Make sure you choose compatible hinges for your laptop model.
2. Prepare Your Workspace
Find a clean, well-lit area to work on your laptop. Lay down a soft cloth to protect the laptop’s surface.
3. Disconnect the Power
Ensure your laptop is turned off, and disconnect the power source. Safety first!
4. Remove the Battery
Remove the laptop’s battery to avoid any electrical mishaps during the repair process.
5. Access the Hinges
Carefully remove the laptop’s screen bezel to access the hinges. This may require removing screws or clips. Be gentle to avoid further damage.
Understanding Laptop Hinges
Laptop hinges are the small but critical components that connect the screen to the base of your laptop. They are responsible for the screen’s movement and stability. Understanding how they work is essential before attempting any repairs.
Common Laptop Hinge Problems
Hinge Squeaking or Grinding
One of the most common hinge issues is annoying squeaking or grinding sounds when you open or close your laptop. This can be caused by dust or debris stuck in the hinge or worn-out lubrication.
Loose Hinge
If your laptop screen wobbles or feels loose when open, you likely have a loose hinge. This can occur due to repeated opening and closing of the laptop or a weakened hinge mechanism.
Broken Hinge
A broken hinge is a more severe problem. You may notice cracks in the hinge, making it impossible to keep the laptop screen upright.
Misaligned Hinge
A misaligned hinge can cause your laptop screen to be crooked when open. It can be due to physical damage or simply wear and tear.
Tools You’ll Need
Before you start any repair, gather the necessary tools:
- Screwdriver set
- Compressed air canister
- Replacement hinges (if needed)
- Lubricating oil
- Cleaning cloth
- Small brush
- Adhesive (for broken hinges)
Preparing for Repair
Ensure you are working on a clean and well-lit surface. Power off your laptop, unplug all cables and remove the battery if possible. Always take precautions to prevent static discharge, which can damage sensitive laptop components.
Fixing a Squeaking or Grinding Hinge
- Start by blowing compressed air into the hinge to remove dust and debris.
- Apply a small amount of lubricating oil to the hinge.
- Open and close the laptop several times to distribute the oil evenly.
- Test if the squeaking or grinding noise has disappeared.
Tightening a Loose Hinge
- Locate the screws securing the hinge to the laptop frame.
- Gently tighten these screws, but be cautious not to overtighten and strip the threads.
- Test the laptop to ensure the hinge is no longer loose.
6. Tighten Loose Screws
If your hinges are loose, simply tighten the screws holding them in place. Ensure not to overtighten, as this can lead to other issues.
7. Replace Damaged Hinges
If your hinges are cracked or broken, it’s best to replace them. Carefully disconnect the old hinges, attach the new ones, and secure them in place.
8. Reassemble Your Laptop
Once the hinges are fixed or replaced, reassemble your laptop by following the previous steps in reverse order. Be meticulous to avoid damaging any components.
9. Test Your Laptop
After reassembly, power up your laptop and test the hinges by opening and closing the screen. Ensure they operate smoothly and without any unusual sounds.
When to Seek Professional Help
While DIY repairs can save you money, some hinge issues require expert attention. Consider professional help if:
- You lack the necessary tools and experience.
- The hinges are severely damaged.
- The screen or laptop body has structural damage.
Conclusion
In the fast-evolving world of technology, laptop hinge problems are common but manageable. By understanding the signs of hinge issues and following our DIY repair guide, you can extend the life of your laptop and ensure it continues to serve you well. Remember, prevention is key, so handle your laptop with care to avoid future hinge-related problems. For more informative articles on maintaining your digital devices and optimizing your online presence,